Microsoft recently unveiled a groundbreaking feature for Windows called Windows Subsystem for Android (WSA), enabling users to seamlessly run Android apps without the need for an Android emulator. This article will guide you through the process of installing WSA on any Windows 11 version, regardless of your Windows Insider status. Additionally, you’ll discover how to install it on Windows 10.
Windows Subsystem for Android is a revolutionary technology that empowers Android apps to run natively on Windows 11. It encompasses the Linux kernel, Android OS 11, and the pre-installed Amazon App Store. This empowers users to effortlessly install and run their preferred Android apps on their Windows 11 devices without encountering compatibility or performance issues.
Windows Subsystem for Android system requirements
 Windows Build Number | Windows™ 11: Build 22000.526 or higher. | Windows™ 10: 22H2 10.0.19045.2311 or higher. May work on Windows™ 10: 20H1 10.0.19041.264 or higher.1 1. You may need to install KB5014032 then install KB5022834 to use WSA on these older Windows 10 builds |
Custom/modfied Windows OS installations (such as ReviOS, Tiny 10/11 and Ghost Spectre etc.) may have issues with running WSA. | ||
 RAM |
| |
 Processor | CPU Architecture: x86_64 or arm64 | |
| Your PC should meet the basic Windows™ 11 requirements i.e Core i3 8th Gen, Ryzen 3000, Snapdragon 8c, or above | N/A This is a bit of a hit or miss, but it is highly recommended that your processor is listed in the supported CPU lists for Windows 11 requirements | |
 GPU | Any compatible Intel, AMD or Nvidia GPU. GPU Performance may vary depending on its compatibility with Windows Subsystem For Android™
| |
 Storage | Solid-state drive (RECOMMENDED) OR Hard Disk Drive (HDD) (NOT RECOMMENDED) | |
| Minimum Storage Requirements: You must have at least 10GB free on the system drive (C:\) | ||
 Partition | NTFS ONLY Windows Subsystem For Android™ can only be installed on a NTFS partition, not on an exFAT partition | |
 Windows Features Needed | Virtual Machine Platform Enabled | |
| Windows Hypervisor Platform Enabled | ||
| These optional settings are for virtualization and provide components that are needed to run WSA. You can enable these settings by pressing the Windows Key + R on your keyboard and typing “OptionalFeatures.exe” into the box, pressing enter and selecting the features above followed by pressing apply | ||
 Virtualization | The Computer must support virtualization and be enabled in BIOS/UEFI and Optional Features. Guide on how to enable | |
Download (WSA) Windows Subsystem for Android
| Download Variant | |||
|---|---|---|---|
| Differences: | Follows the “WSA Preview Program Channel” | Follows the “WSA Retail” or “Insider Fast Channel” | |
| Builds are generally newer than the “WSA Retail” and “Insider Fast Channel” | Builds are generally more stable than the builds in the “WSA Preview Program Channel” | ||
| Current Version: | 2309.40000.2.0 | 2308.40000.3.0 | |
| Release Date: | Builds Released: 27/09/2023 | Builds Released: 19/09/2023 | |
| Update Frequency: | Multiple Updates Every Month | One Update Every Month | |
It is recommend to check this table regularly to see if there is a newer update avaliable for WSA for the Stable Builds and Pre-Release Builds | |||
| Operating System | Download Page | Download Mirror |
|---|---|---|
|
| |
| ||
|
|
Install (WSA) Windows Subsystem for Android
1. Enable Virtual Machine Platform
Before enabling the Virtual Machine Platform feature, the computer must enable virtualization on the UEFI firmware. If you don’t have this feature enabled, check with your computer manufacturer to find the details needed to complete this task.
To enable the Virtual Machine Platform on Windows 11, use these steps:
- Open Start on Windows 11.
- Search for Turn Windows features on or off, and click the top result to open the app.
- Check the “Virtual Machine Platform” option.
- Click the OK button.
- Restart the computer.
Once you complete the steps, you can continue with the steps to install WSA.
2. Install Windows Subsystem for Android
Once you’ve enabled the Virtual Machine Platform, you can start the installation process.
- Extract the file using a program like 7zip or WinRAR.
- Rename the extracted folder to WSA.
- Move the file to your Documents folder.
- Open the folder and run the Run file as an administrator.
- This process may take a few minutes, so be patient.
- When it’s finished, a page will open to confirm that the installation was successful. The Windows Subsystem for Android program will also open.
- Go to Advanced Settings and enable Developer Mode.
- When you see a message, click Continue. The system will be preparing to start.
- When it’s finished, the file manager will open.
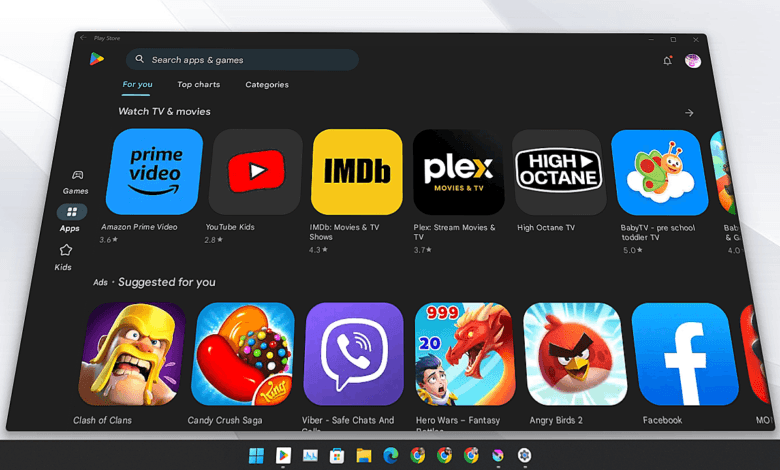
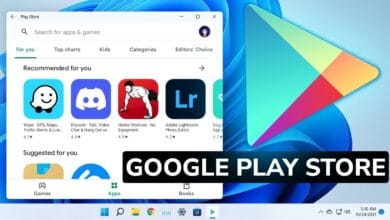
- Now you can search for Google Play, sign into your Google account, and download your favorite apps.
I hope this is helpful! Let me know if you have any other questions.


How to fix the safety net?
Good morning,
Thank you, Google Play is installed correctly. However, he cannot connect to the internet. Do you have any idea why?